18 September 2015
Wow, just checked the date of the last comment, Nov 2014. I will bring you up to date now.
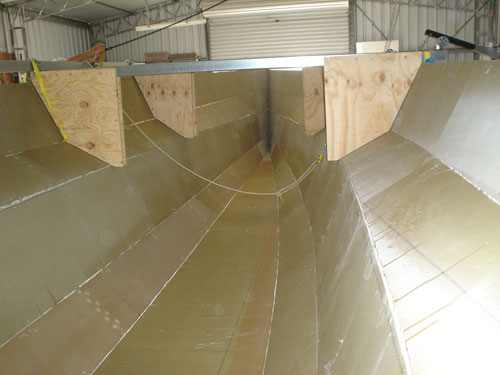
All of the chines have been taped on the inside. I use a system of laying the areosil bog along the joint in a roughly formed
fillet for about 2.5-3.0 metres and applying pre-wet tape lapping about 50mm onto the previous section of tape. The tape is
rolled with a compacting roller and peel ply added. The compacting must be done before the bog fillet kicks otherwise you will
have a mess with lumps under the tape.
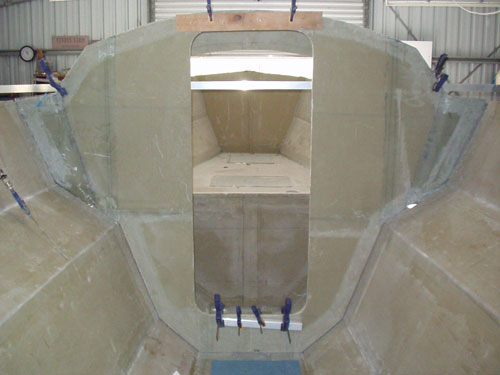
Taping the inside of the stem was next, this required quite a lot of bog and resin, I learned here that making a bog using
unwaxed resin and fillers does not work too well. The unwaxed resin tends to have an extra-longgel time. Then followed Bulkhead 1
done in two parts with the anchor shelf glassed in before the top half of the Bulkhead was taped to the hull sides.
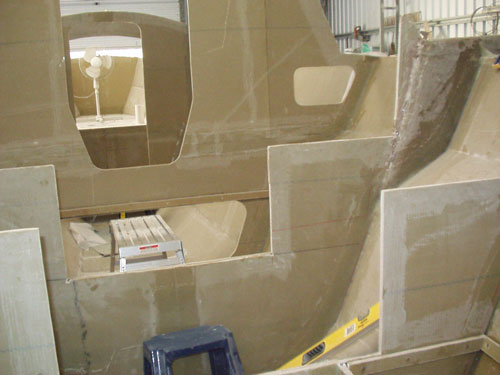
Next was Partial Bulkhead 2 and Bulkhead 3A. Once they were taped in the forward bunk top was taped in. Cleats made from scrap
foam were glued to the hull sides to support the underside of the bunk top and the bunk top glued to the cleats, a fillet was
then applied and pre-wet tape added to finish off the bunk top installation. I have found that pre-wetting the tape on plastic
or baking paper, rolling it up and then carrying it into the hull in a paint roller tray works very well. Before the bunk top
was taped in I painted the area between the bulkheads with white Jotun and cut the openings for the access hatches for storage
under the bunk.
As I am deviating from the published design and using a schooner rig I need a foremast step at Bulkhead 3A. This was laminated in
at the aft face of 3A. Bulkhead 4 with the massive beam stubs was built in two halves and joined in the hull. I manhandled the
thing on the outside and fed it through the slots in the side of the hull, Fran guided it into its correct location on the
inside. This Bulkhead was double taped to the hull on the inside, I havent taped the outside yet.
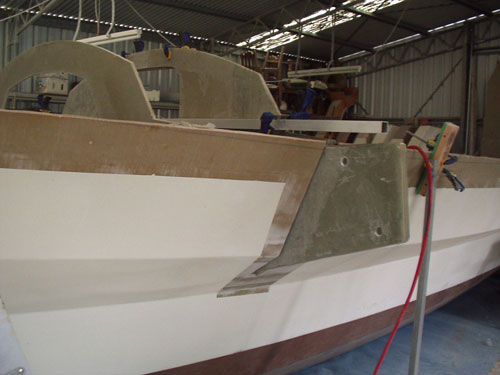
Bulkhead 6B was taped in next, then 8 also with the beam stubs using the same method as used for Bulkhead 4. The outboard motor
will be supported by Bulkhead 8A, this was taped in together with the sides of the outboard motor well and the cockpit floor
between 8A and the transom. Fran and I were discussing the large volume of hull between Bulkhead 8 and 8A and she came up with
the idea of a wet locker so we now have a locker about 500mm wide between 8 and 8A which will hold about 60 litres of fresh water
in 3 containers. The hatch will be a fairly tight fitting lid and will only leak in prolonged heavy rain, with the fresh water
in jerry cans there will not be much water to pump or sponge out.
At the moment I am working on the cockpit floor and painting Jotun on the hull surfaces under the cockpit that will be accessible
from the inside of the hull.
|
14 November 2014
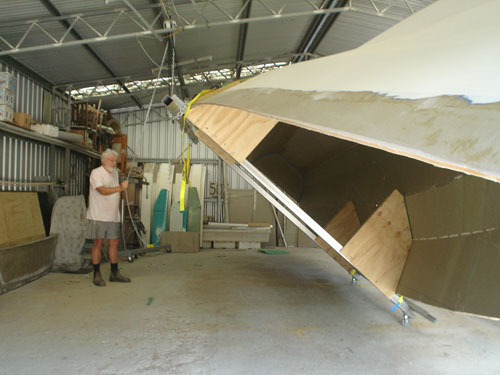
Quite a bit has happened in the building shed in the last 2 months. I built a cradle over the Scarab 32 main hull to support
it while it was turned over, this didnt work out as well as I planned so it was scrapped and a new system built.
I attached two 75mm x 75mm steel square sections across the hull at deck level bolting them to temporary plywood partial
bulkheads which were in turn bolted to the hull. The forward one was bolted at Station 4 where the beam stubs will extend
outside the hull so no worries about the bolt holes, the aft one was attached at Station 6 so I will have some bolt holes to
fill and patch.
I checked the Live Load allowance for the shed roof and checked the weight of the empty hull shell (200 kg) and all was well
for just lifting one side of the hull, at no point was the shed roof supporting the entire weight of the boat. A chain block
was used to lift one side and then carefully let down to allow the hull to sit on its bottom. The inside of the chines are
now being taped and when complete the bulkheads will be set up and taped to the hull. I have built a steel trolley with
castor wheels and the hull will be lifted onto that after most of the bulkheads have been taped in. The main bulkheads at
Station 4 & 8 will be a bit heavy, so after cutting the hull sides to allow the beam stubs to fit I will lift them with the
chain block and position the hull beneath the bulkhead so it can be let down and taped in. This is all so that I dont have to
bust my gut lifting and positioning them.
Its getting quite hot in the shed now, some days over 40 deg C so most of the laminating work will have to be done early in
the morning. Fran is going to build the bulkheads so that will speed up progress.
All the best
Ray
|
Hi
7 September 2014
Well it's been awhile since the last blog. I now have the copper coat anti-fouling on the bottom and am removing the temporary
frames and building jig. I have constructed a cradle over the hull to faciliate turning it. More photos soon.
I have just returned from Sydney (the fifth trip since the last blog) to see my dear old Dad who is in his nineties and not in the
best of health. I also saw my family and grand children Ash and Neha.
Ash is a Sabot sailer and in incredibly interested in every
aspect of the new 32 footer. Neha is more interested in horses than boats and likes to go trail riding. Ash likes to know about
the construction of the boat, how we will arrange the accommodation and what he will be able to do when sailing. We will do
some short sails at first, Tin Can Bay to Gary's Anchorage or Kingfisher Bay and maybe do a bit of fishing. We both like fresh
fish.
Ray
|
Hi,
30 November 2013
It has been a while since my last write up, the usual excuses apply, trips to Sydney, too many projects on the go at the same
time etc.
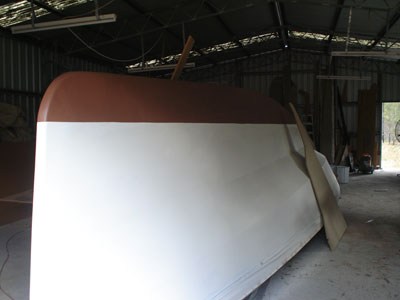
I am waiting for the Copper Coat epoxy antifouling to arrive from the UK so I can apply it to the bottom of the main hull before
it gets turned over. I have started to apply the Jotun Penguard high build primer to the topsides between the waterline and a
line 150mm below the sheer line. I have to leave this section below the sheer clear of paint to facilitate bonding the deck and
taping it down to the hull side. I have been using an airless sprayer for the high build primer and it has worked well although
there are a lot of components from the spray gun that need cleaning when finished.
The water line was set up using a laser leveller on a tripod and the system worked really well. The laser was not very
expensive (about $40 a few years ago) but has surely been worth every cent spent on it.
Also I am getting ready to take the Scarab 18 (Magic Scarab) out for some serious sailing as soon as the weather settles down a
bit, we have had lots of storms come through lately. The last doozy was the worst hail storm I have ever seen. Had hail stones as
big as golf balls with some as big as tennis balls, fortunately the cars were under cover but some of the boat hulls stored
outside suffered, had some old plywood hulls where the hail went through the plywood. All of the shed roofs and the roof on
the house (galvanised corrugated steel) have been dented.
Regards
Ray
|